Patient:
Dentate or Partially Edentulous
The Allure Dental Studio Guided workflow is a major improvement over competitive systems and will significantly reduce the conversion time and simplify the process.
We highly recommend that you request one of our specialists for your first case to ensure ease of delivery. Extra fees apply.
We cannot guarantee a successful case without making sure that you have a thorough understanding of our workflow.
Our technicians are highly trained in our guided workflow procedures and will be happy to be of assistance.
Our streamlined and simplified conversion process can be easily taught to your assistants for future cases. Upon request, one of our chairside experts can be present at your next conversion. Contact Allure Dental Studio at (877) 325-5873.
PMMA Conversion Steps
To achieve a predictable and easy conversion, make sure that all previous steps were followed to the letter.
Cutting corners will result in poorly fitting PMMA temporary appliance.
PMMA Conversion Prosthesis

Parallel & Divergent Paths of Insertion
Parallel and Divergent Path of Insertion

There are times in which all cylinders can not be picked-up at the same time due to path of insertion issues. We will notify you of these issues on the surgical report and instruct you in the sequence of events.
Temporary Cylinders
Placement of Temporary Cylinders and Clear Silicone Washers

Place the provided clear silicone washer over each temporary cylinder.
Place screw in the cylinder and take to the patient mouth.
Position the temporary cylinders onto each abutment and hand-tighten. You may need to reposition the clear rubber dams at the base of the cylinder collar.
If the washers overlap over the cylinder, you may have to trim the excess.
You are now ready to place the PMMA temporary prosthesis onto the UKF.
Seating and Luting
Preparing For the Pick-Up
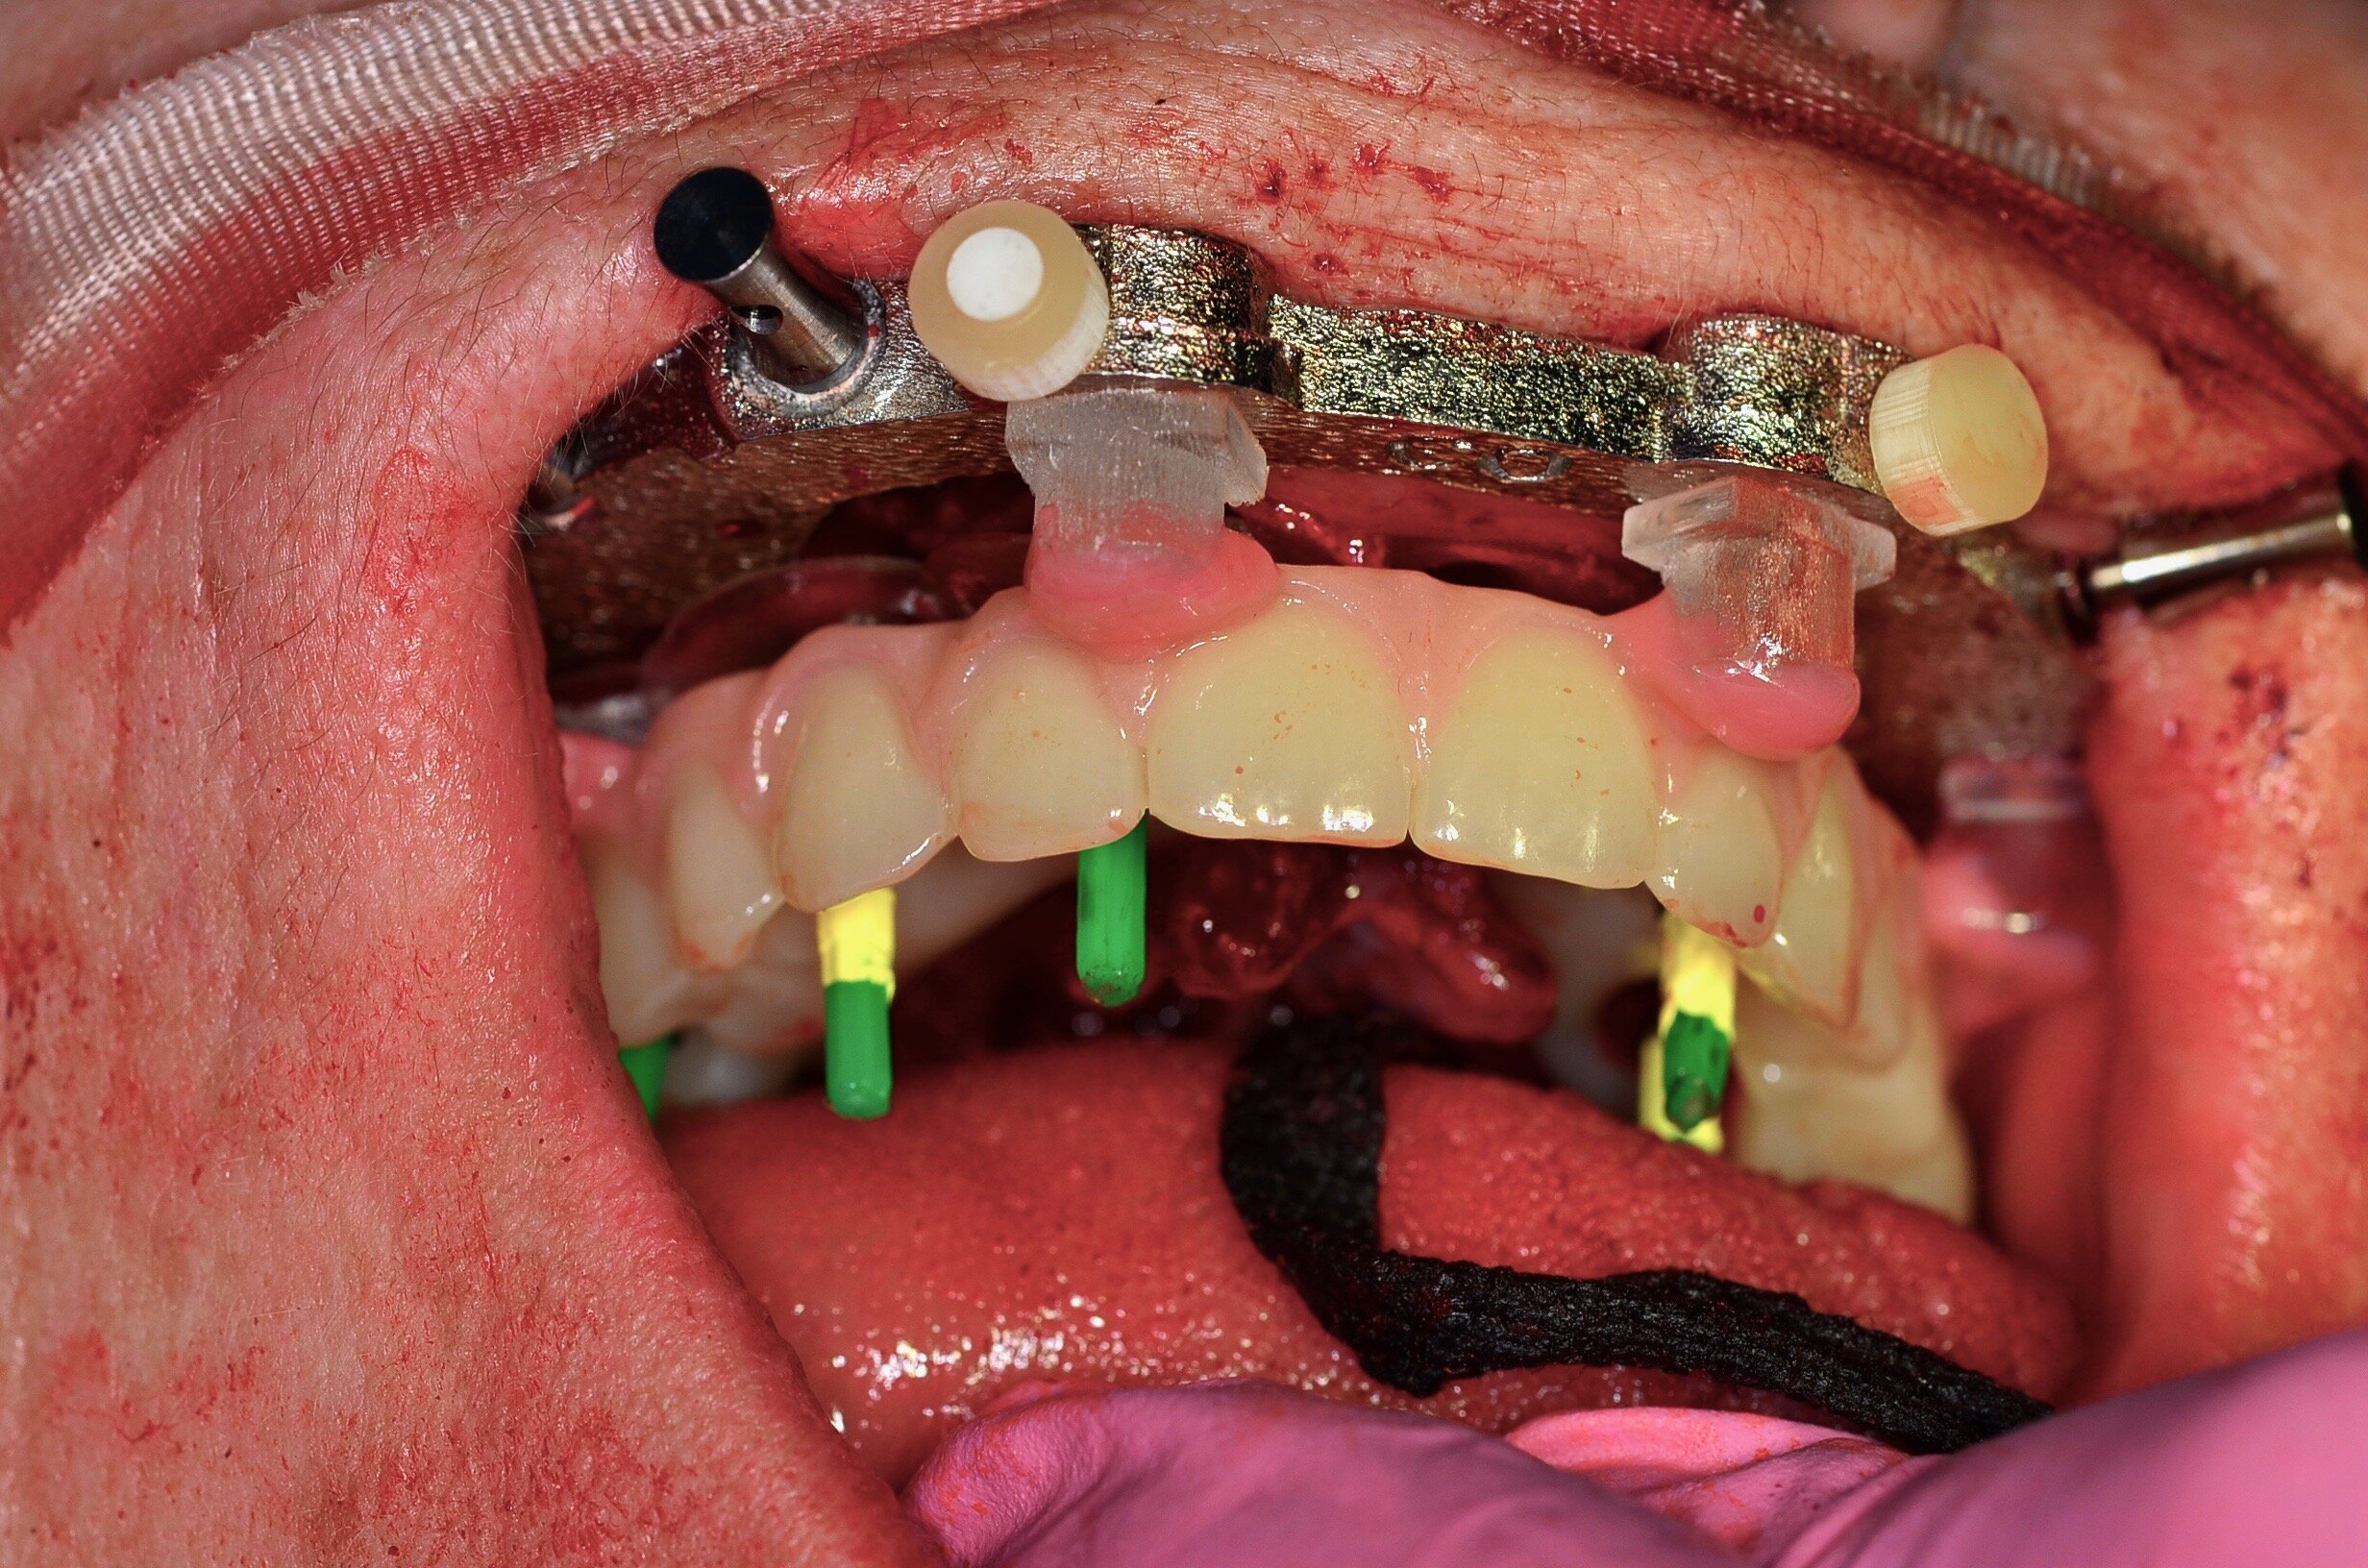
Make sure that the PMMA temporary prosthesis is seated passively and is 100% flush against the UKF. Each latch post needs to seat flush against the UKF prior to inserting the retention pins. If it does not seat passively, check for debris in the UKF or for obstructing soft tissue.
Once the temporary is seated and securely latched, visually inspect the space around each temporary cylinder. You should have enough space to flow composite around each cylinder.
Place screw access protectors in each cylinder.
Once done protecting each access hole, pre-treat the PMMA to manufacturer recommendation. Some cement require bonders, others require a clean field prior to bonding. You may use self cured or light cure material as long as protocols are followed for best results.
Flow composite in each hole making sure to capture as much of the cylinder and the PMMA wall as possible. It is a good idea to start by the intaglio of the PMMA and bring your syringe toward the top of the cylinder.
Once done with filling each site with composite light cure or wait for it to set.
Once set, remove the access hole protector and unscrew the PMMA.
Remove each latch pins and pull out the temporary.
You are now ready to do the same for the VOS appliance.
Restorative Pre-Steps
VOS Appliance

This step is performed right after suturing and before delivering the PMMA.
This step reduces chair time and simplifies future restorative appointments.
We highly recommend that you take the extra few minutes to do this steps. It will highly simplify the restorative steps.
Duplicate the pick-up process.
Suturing

Position comfort cap on each abutment prior to suturing.
Finalizing the Temporary
These steps are completed by the chairside technician/dental assistant while suturing is being carried out. By the time you are done with sutures, the PMMA temporary will be waiting for you in a cup filled with Peridex.
Cut Latches, Refine and Polish Temporary

Deliver PMMA

Film the revealing of the new smile to the patient, and make sure that your staff is present when doing so. In most instances having new beautiful teeth is a very powerful and emotional moment for the patient and all your staff needs to see this.

Take lots of pictures
Last Section:
Next Section